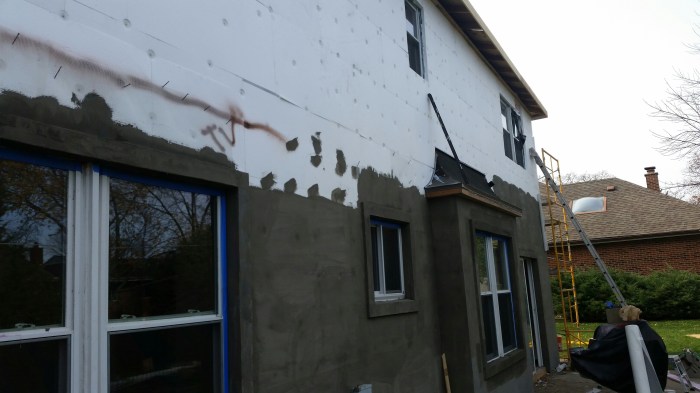
An Exterior Insulation and Finish System ( a.k.a. Sythetic Stucco) is an exterior wall-cladding system comprised of insulation boards attached to a substrate, covered with a reinforced base coat, and a textured protective finish coat. EIFS was introduced in the US in the 60’s and transitioned from commercial buildings to residential homes. It resembles Stucco but is considered more versatile as it comes in a wide variety of colors, textures, and can be formed into near lmitless shapes and designs (cornices, arches, columns, keystones, cornerstones, special moldings, etc). EIFS is considered by many industry professional and architect to be the superior exterior cladding product with respect to thermal and moisture control.
The modern and most predominate EIFS system currently is a Polymer-based (PB) system (EPS insulation, adhesive attached, and a 1/16″ base coat) and has a drainage aspect which helps eliminate moisture before it has a chance to enter the wall cavity.
The less common type of EIFS is a Polymer modified (PM) system (XPS insulation, mechanically attached, and 3/16 – 1/2″ base coat).
The two primary types of EIFS systems are:
‘Barrier Wall System’
‘Wall Drainage System’.
Barrier Wall systems rely primarily on the base coat and significant flashings/sealants to resist moisture, while a drainage system is similar but has a water-resistive barrier and a drainage plane which typically perform better and have become more common.
Exterior Insulation and Finish Systems are proprietary by nature but follow the same general assembly which consists of the following components in order: Substrate, water-resistive barrier (optional), adhesive, Drainage plane, Insulation board (mechanical fasteners if no adhesive), Reinforcing mesh, Base Coat, Primer (if not integral with base coat & primer color), Finish Coat. The drainage plane is most commonly achieved by installing vertical adhesive ribbons over the substrate (or water-resistive barrier). The insulation board used is most commonly Expanded Polystyrene (EPS) foam insulation. The insulation is most commonly attached with adhesive but can also be attached with specialized mechanical fasteners if the existing substrate isn’t conducive to application (very smooth or painted). The base coat is applied to the insulation and a reinforcing mesh is embedded in. After the base coat dries, the finish coat is then applied with the chosen finish to complete the system.
A vast majority of the problems with EIFS are tied to moisture intrusion into the system which cannot find it’s way out. These problems are very commonly traced to flashing, sealing, and caulking installation defects and joint failures particularly around windows, doors, joints, penetrations, etc. However there have been a number of class action and individual law suits won and settled against manufacturers, most of which happened in the early years of product introduction. The drainage system type of EIFS has improved the failure rate of modern EIFS as many of the installation after 1997 were drainage systems, however the vast majority of residential homes currently with EIFS cladding are barrier-type.
EIFS typically must be purchased from a licensed distributor, who itself (or with assistance from the manufacturer) trains and issues certificates or installation licenses. The burden of only selling product to licensed installers is typically carried by the distributor. The unfortnate truth of EIFS installation however, is that following specifications very closely can add to contractor cost which often leads to incorrect installations. Below is an explanation of each step required for a ‘Wall Drainage System’:
Preparation of Substrate
If wood or fiberglass sheathing will be the substrate, it should be smooth and free from surface defects or moisture damage and such areas /repaired replaced if necessary.
Concrete must be free of form oil, curing compounds, or release agents by using a detergent wash and water-blasting or other mechanical methods (grinding or sandblasting). Cracks up to 1/8″ can be prepared by filling with joint product mentioned below. Cracks 1/8″ – 1/4″ can be filled first with an acrylic-latex caulk.
Brick or concrete block must be free of surface contaminants as well especially including efflorescence (often removed with wire-brush). Also brick or concrete block must have flush mortar joints (not raked or convex). Though often not in a project’s budget, a cement based parge coat provides a good surface for application of the moisture barrier and insulation adhesive.
Water-Resistant Air/Moisture Barrier
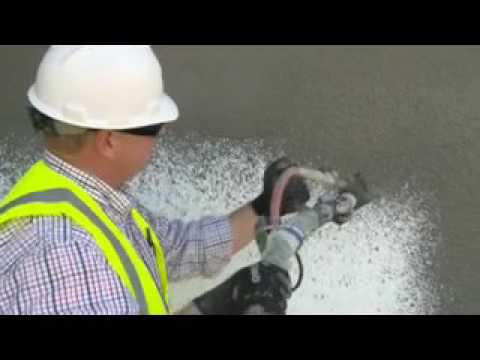
Water-Resistant Air Barriers are typically liquid-applied systems which provide a continuous and seamless barrier to air and moisture (sometimes even waterproof) which is secondary to flashing and sealing water-penetration prevention. It is typically more durable than building wraps or papers. They are most often proprietary products meant to be used with specific EIFS systems, manufacturers, and polystyrene boards. Products are typically a single-component (polymer), spray or brush/roll cold applied, product which forms a strong, seamless, membrane to resist air and vapor. The product commonly comes in 5 Gallon pails and will usually cover: glass-mat or exterior gypsum 400-650 SF; plywood 500-700 SF; OSB (2 coats recommended) 200-300 SF; brick or CMU (2 coats recommended) 100-350 SF at a 10mil wet thickness (up to 30mil for masonry/concrete or uneven surfaces). Most products can be installed down to 40 degrees fahrenheit but should not be installed on ‘green’ concrete (14 day cure minimum typical).


When being installed on concrete block walls, all cracks/voids/irregularities/etc must typically be repaired with a specialty patching product a couple hours prior to fluid-applied barrier installation. A trowel-applied preparatory product is commonly installed first to all joints, rough openings, and corners as an additional flashing measure and to ready the substrate. Barrier product is typically applied with a spray pump, airless sprayer, or nap roller (1/2″ for sheathing, 3/4″ for masonry/concrete). When installing on exterior gypsum or fiberglass paneling, joints will typically require reinforced or mesh wallboard tape prior to installation of vapor barrier.
Temperature, huminidity, airflow, sunlight, etc will effect drying time but 2-4 hours under normal weather conditions is typically recommended as a minimum before adhesive/insulation/base coat application.
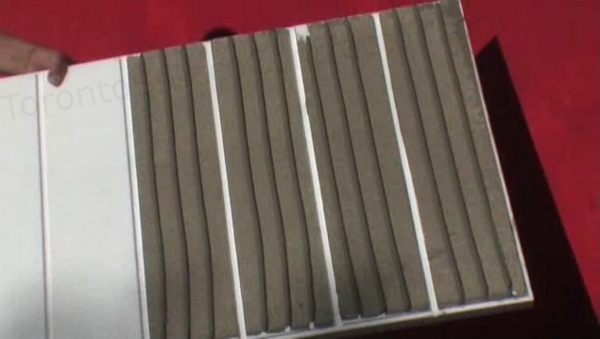
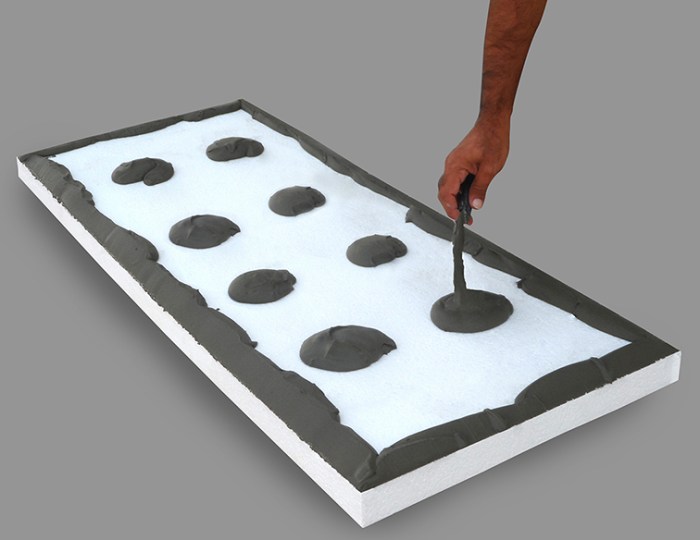
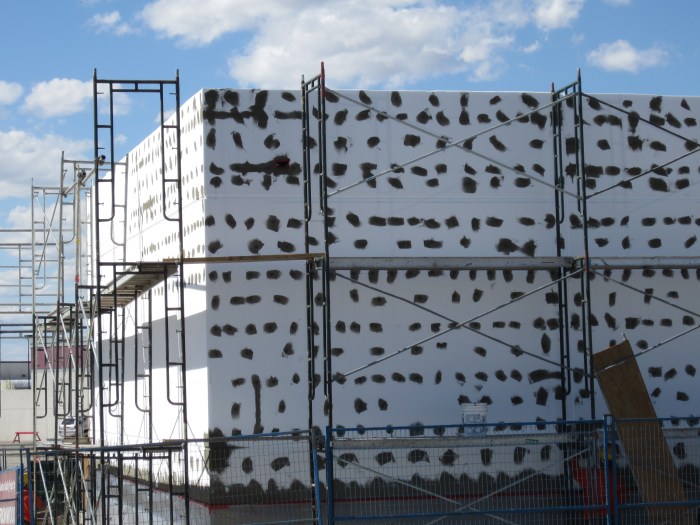
Adhesive (and Drainage Plane)
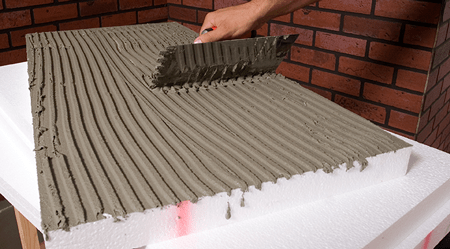
The drainage plane is typically created through vertical ribbon adhesive strips which double as the application method for the insulation boards. Different products are made which are geared towards different substrates. Some of the different product makeups are; water-based/mixed, solvent-based; cement-based or acrylic-based; polymer-modified; one-part premixed, two-part site mixed, etc. For gypsum/wood sheathings, 3/16 x 3/8″ U-notched trowel formed beads are commonly installed vertically onto the insulation boards. For masonry/concrete surfaces, a 5/8″ x 5/8″ square-notched or 1/2″ x 1/2″ U-notched trowel is used for bead application.
Insulation Board
Expanded Polystyrene is most commonly utilized as insulation but Extruded Polystyrene is also an option for some systems.
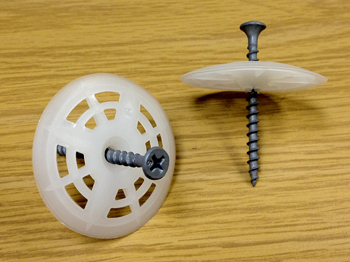
Insulation board is typically proprietary to the manufacturer of the system being used. The common minimum thickness for EPS insulation boards is 3/4″ and the maximum is typically 4″. Boards are typically square cut and the largest common board size is usually 2′ x 4′. As mentioned above, mechanical attachment of insulation boards is not the preferred choice unless a smooth and/or painted surface will be the substrate. Fasteners can act as thermal bridges which resist the very purpose of the insulation plane design. Also fasteners can ‘telegraph’ or mirror through to the surface of the EIFS assembly and reduce the wind resistance of the system. Sometimes mechanical-fastener attachment however is required or is required in addition to adhesive. If mechanical-fastening is used, oversized plastic washers are utilized, and a 1-1/2″ thick minimum of insulation board is typically recommended by the manufacturer.
Prior to applying the insulation board, ‘backwrapping’ is typically required which is essentially wrapping insulation abutment with bases, window/door opening transitions, roof transitions, expansion joints, and penetrations with added +/- 4″ strip of (+/- 2″ exposure) mesh reinforcement. This allows for extra protection of the edges from damage and promotes additional adhesion to insulation edges.

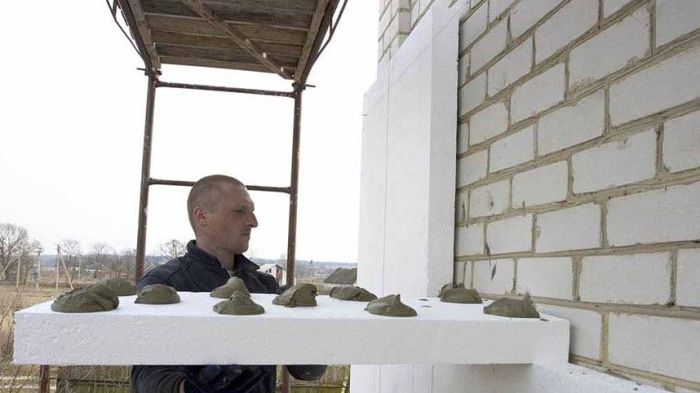
The boards are butted tight together and any excess caulk removed to limit any thermal bridging action and telegraphing/reflecting cracks. EPS boards are commonly cut with a utility knife at a slight angle but a table saw or a hot-wire machine may be used as well. The adhesive is applied directly to the boards parallel to the short side of the board with the proper notched trowel. Boards are placed so vertical joints are staggered and sufficient pressure is required to achieve the right ‘grab’. Uniform pressure should be applied over each board and can be achieved with a rasping board if needed. Inside and outside corners are staggered and offset from horizontal sheathing joints by at least 6″ to resist cracking if sheathing joints move. Any joints wider than 1/16″ (able to accept a credit card) must be filled with either a wedge of insulation or polyurethane spray foam. The entire surface of the insulation plane must be smooth, level, and ensure the best substrate and uniform look of the finish coat to come. A rasping board with 12 grit floor sandpaper is used to smooth the entire surface (not just the joints) typically completing the insulation stage.

Base Coat & Reinforcing Mesh
A base coat is applied as an initial surface to provide shape for and accept the finish coat. The base coat is commonly 1/8″ but is applied in some ‘high-build’ cases up to 1/4″ thick or more.
It can be important to apply the base coat soon after insulation as the foam board surfaces can break down with excessive exposure to sunlight and develop a powdery film which must be removed. Base coats are typically site mixed with water, cement-based, and fiber reinforced. Acrylic, polymer-modified, spray-friendly, and synthetic (non-cementious) formula variants are available.

Base coat is applied vertically or horizontally in strips of +/- 40″. Right after the base coat is applied by trowel or spray, a reinforcing mesh is applied by pressing into the base coat enough so it’s no longer visible. All mesh butt joints should be overlapped 2-1/2″ inches with the base coat later feathered out.
‘High-Impact’ mesh is available for areas expected to receive more abuse. It’s important to apply an additional strip of mesh around the perimeter of all openings (4-6″ with 45 degree diagonal ‘butterflies’), inside, and outside corners (8″ each direction) to provide extra strength to the system. The base coat commonly requires a minimum of 24 hours of curing time before the surface coat can be applied.
Primer (optional)
Use of a primer is optional, but like any finish coating product, priming can provide uniform absorption of the substrate and enhances finish color. If the base coat is tinted to a shade that resembles or matches the finish coat, primer is typically unnecessary.
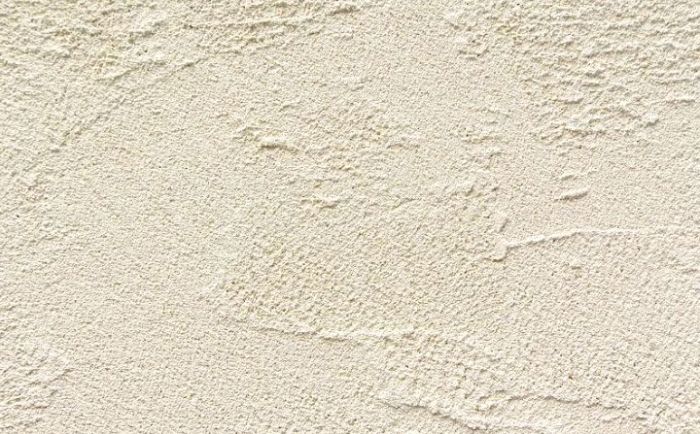
Finish Coat
After the minimum 24 hour hour base coat cure time, the finish coat can be applied, often at a thickness of 1/16″-1/8″. Finish coat is typically field mixed with water and applied with stainless steel trowels.
Water may need to be adjusted in the mix to create the proper consistency for application and to assure new mixes match the previous.

Sufficient manpower to handle the finish area during the ‘workability’ period is critical. Working in pairs can be efficient as the first person applies the finish coat with the second person floating to the proper texture. V-grooves may be designed and installed into the system to provide pleasing aesthetics.
These must often be cut into the insulation boards first however and 3/4″ is minimum insulation thicnkess must be maintained. It’s important to avoid installing separate batches side-by-side as achieving a color match is very difficult. Many contractors will mix enough of one batch to tackle one wall plane up to a corner or other break in the wall. There are 5 primary textures to choose from: Pebbled; Rilled; Freestyle; Stone Finish; Variegated Bead.
Even with drainage systems, caulking/sealants are crucial to minimize moisture intrusion to the drainage plane. Wherever the insulation boards joint together with another material, that joint must be caulked. This includes doors, windows, roofs, pipes, etc and a minimum of 1/2″ wide sealant is required.

The caulking should be done after insulation and prior to base coat as the sealant joints should be encapsulated with base coat and mesh. The surface coat however, will typically not encapsulate the caulk joint areas like the base coat does.
Expansion Joints
Expansion joints are a break in the EIFS section and are very common in EIFS systems. They are critical in allowing the entire system to move in a controlled jointing pattern, reducing the tendency of the base and surface coats developing stress and movement cracks.
Expansion joints are required at: floor lines for mulit-story lumber framed structures; at dissimilar substrates or materials; at existing substrate joints, changes in building height; areas of expected movement.