Metal Siding Panels are often utilized on larger commercial buildings, industrial buildings, garages, and more. The material types are typically aluminum, galvanized steel, zinc-coated steel, stainless steel, copper, and alloys of different types of metal. They are produced in many different sizes, thicknesses, shapes, and sizes with a number of finishes and coatings. Some more common finishes are vinyl plastisol, fluorocarbon, and siliconized polyester.


The typical steel thickness ranges are 12 – 29 gauge with the higher gauge being thinner material. Panels are commonly 22-36″ wide and 5-12′ long. Common aluminum panel thicknesses are 0.024, 0.032, 0.040, and 0.050″. Aluminum sheets commonly range from 35″ to 48-1/2″ wide and lengths of anywhere from 3′ to 30′. The different profiles commonly made in metal siding panels are standing seam, trapezoidal, corrugated, ribbed, curved, and tapered, and recessed. Fasteners can often be concealed or exposed, will be non-corrosive, have a certain specified spacing distance. Metal Siding is often interchangable and can be used for roofing as well but check with manufacturer on this possibility and the trims and accessories required for each. The following is a list and description of basic trims, flashins, parts, and pieces typically used on a metal siding project:
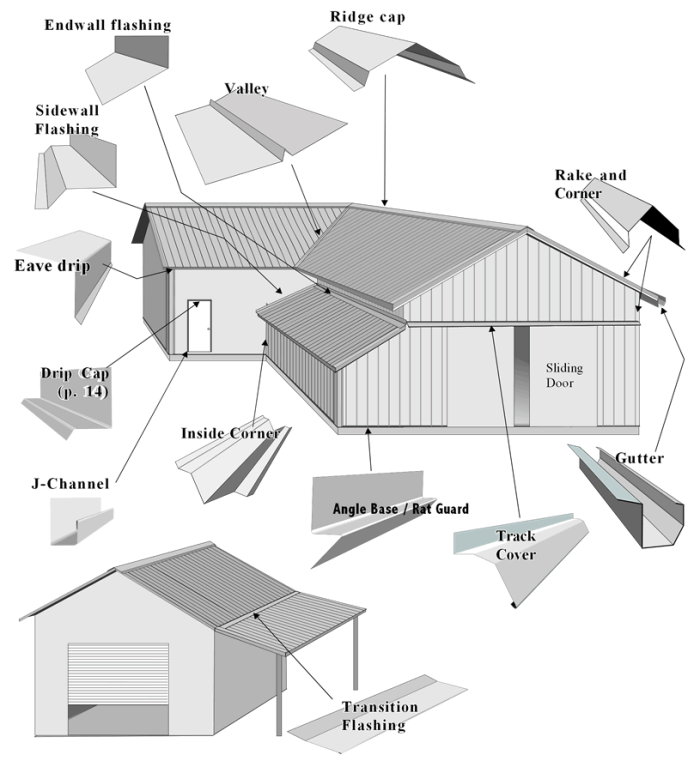
– Outside Corner – Used to trim/flash

– Wall Base Drip Edge – Used at bottom of wall to shed water

– Door/Window/Opening Head Flashing – Installed attached to header

– Jamb Flashing (or J-Channel) – Installed vertically attached to jambs


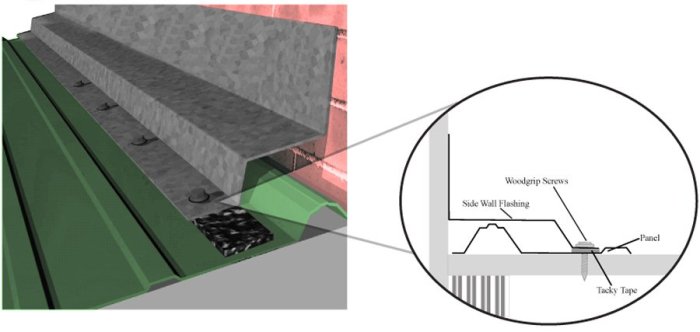
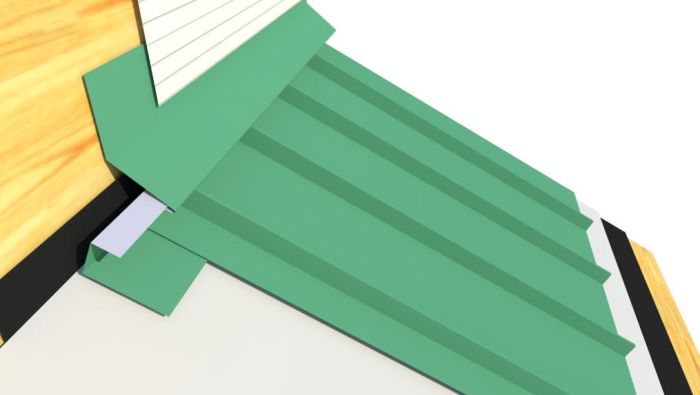
– Sidewall Flashing – Typically installed at vertical to horizontal joints on sidewalls
– Endwall Flashing – Typically installed at vertical to horizontal joints on endwalls
– Inside Corner – Used to trim/flash

– Zee Flashing – Often used as horizontal trim which terminates/separates panels from masonry wainscot

– Specialty Trims – Other proprietary trims or specialty trims for unique or unusual locations or transitions – check with manufacturer
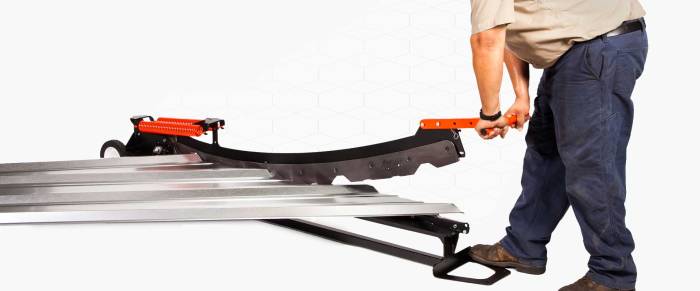
Metal siding panels must be stored on end, not flat, and when ultimately placed must be lifted from the stack not slid. Prior to installing panels, any non-cap trims should be installed on the building. The first panel is typically started at a corner and must be plumb and straight as the remainder of the panels will follow it’s horizontal alignment. Panels are commonly lapped a minimum of a couple inches depending on the profile of the panel. Panels can typically be cut with tin snips, electric/pneumatic shears, a profile shear, circular saw, or an electric nibbler.
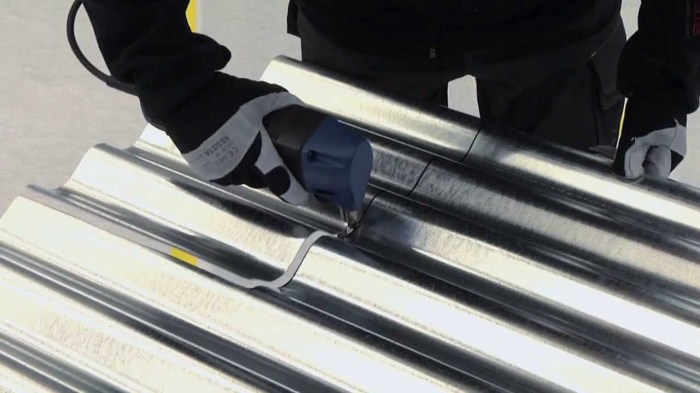


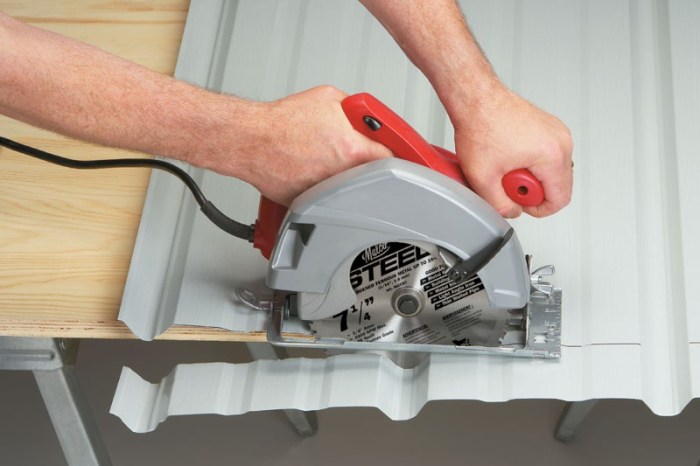
For circular saw cutting a carbide-tipped light-gauge-metal ferrous blade should be used. While sealant may be required at each lap joint for roofs, it is much less common for vertical metal wall panels as water passage does not occur transverse to the joint. If the wall panels are to be installed horizontally however, sealant or closure strips may be required. Wall panels should terminate approximately +/- 6″ from grade. It is common for only a few fasteners to be installed on each panel for temporary support until later on when all fasteners are then installed. Common fastener lengths are +/- 1-1/2″ (should penetrate wood at least 5/8″), often self-tapping, and neoprene/sealing washers are sometimes used. Lap screws (type ‘S’ hex head) are often +/- 1″ and are used at lapping points where sheet is flat to substrate. Wood ‘Frame’ Screws ( hex head) are commonly used at ribs/trims where panels offset from subsrate. Stitch screws (Tek screw hex head) are used at ribs/trims where panels offset from substrate but don’t actually penetrate substrate. Screws should not be overtightened as ‘oil-canning’ may result. A separating membrane must be utilized between dissimilar metals and between aluminum and treated lumber.
